QR Orders at the Table, Tables, and Waiter Mode: the Ordering System for Restaurants by IAMenu
10 minutes
markdown The leap from "QR menu" to "ordering system" is the one that saves the most time in the dining area: the customer scans the QR of their table, orders from their mobile, and the order appears in your kitchen kanban with a notification sound. No apps, no commissions per order, and no need to change your POS — IAMenu is the complement that takes the order, not a replacement for your cash register.
What you will learn in this section
- Activate digital orders and choose the mode of operation
- Create your tables (types: dining room, bar, terrace...) and their QR codes
- How the customer orders from the table
- Manage orders in the kanban: receive, prepare, serve
- Waiter Mode: take orders from the waiter’s mobile
- Waiters with PIN (no email)
- Takeaway orders and without a table
Step 1: Activate orders and choose mode
In the side menu, go to Orders → Settings. Activate "Digital orders on your public menu" and choose how you want to operate:
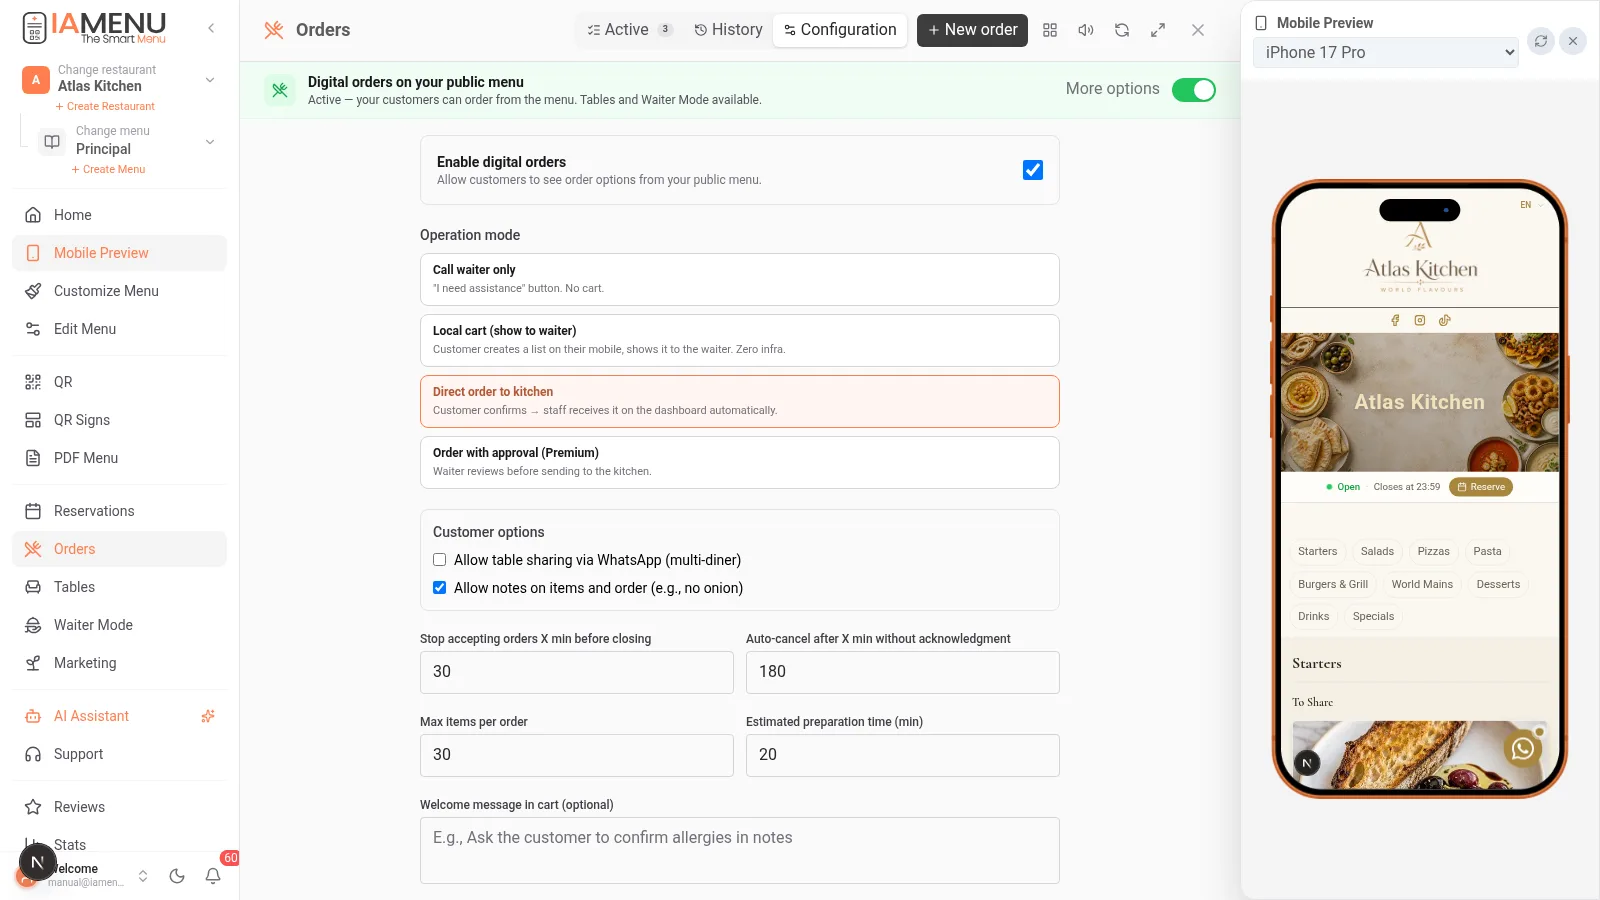
| Mode | What it does | Ideal for |
|---|---|---|
| Only call waiter | The customer presses a button and notifies the dining area; no cart | Classic service with digital assistance |
| Local cart (show to waiter) | The customer builds their list and shows it to the waiter | Smooth transition to digital ordering |
| Direct order to kitchen | The order goes directly to the kanban (recommended) | Terraces, high turnover, few staff |
| Order with approval | Staff accepts each order before it goes to the kitchen | Total control |
Additionally, you configure: how many minutes before closing you accept orders, if the customer can add notes per dish ("no onion"), estimated preparation time, and a welcome message for the cart.
Plans: Orders and the 4 modes are included in Professional and Premium. Starter does not include orders. The current limits of each plan are on the plans page.
Step 2: Create your tables and their QR codes
Go to Tables in the side menu:
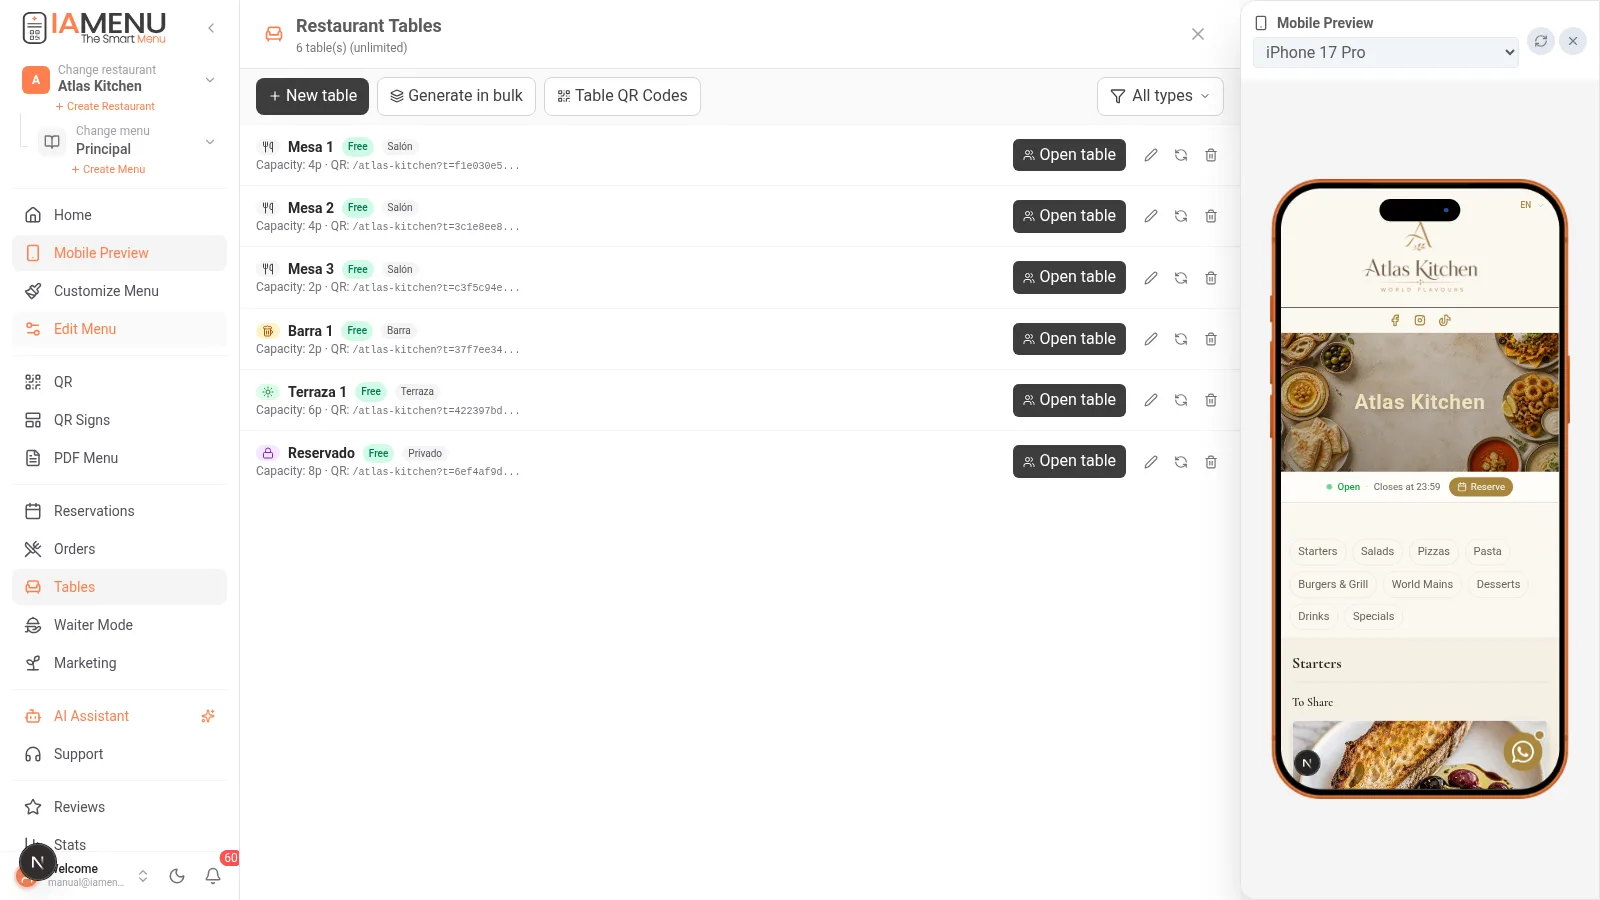
- Create tables one by one or in bulk ("create 12 tables" in one click)
- Each table has a type (🍽️ table, 🍻 bar, 🍸 cocktail, 🔒 reserved, ☀️ terrace), capacity, and location
- Each table receives a unique and unalterable QR: if you change the menu, the QR still works (never reprint)
- Open/close table: when seating a group, you open the table; all their rounds of orders are grouped with the total accumulated
To print nice table QR codes, use QR Posters → Table QR: generate a multi-page PDF with the same elegant template for all your tables, with the number of each one. More in the QR code section.
Step 3: This is how your customer orders
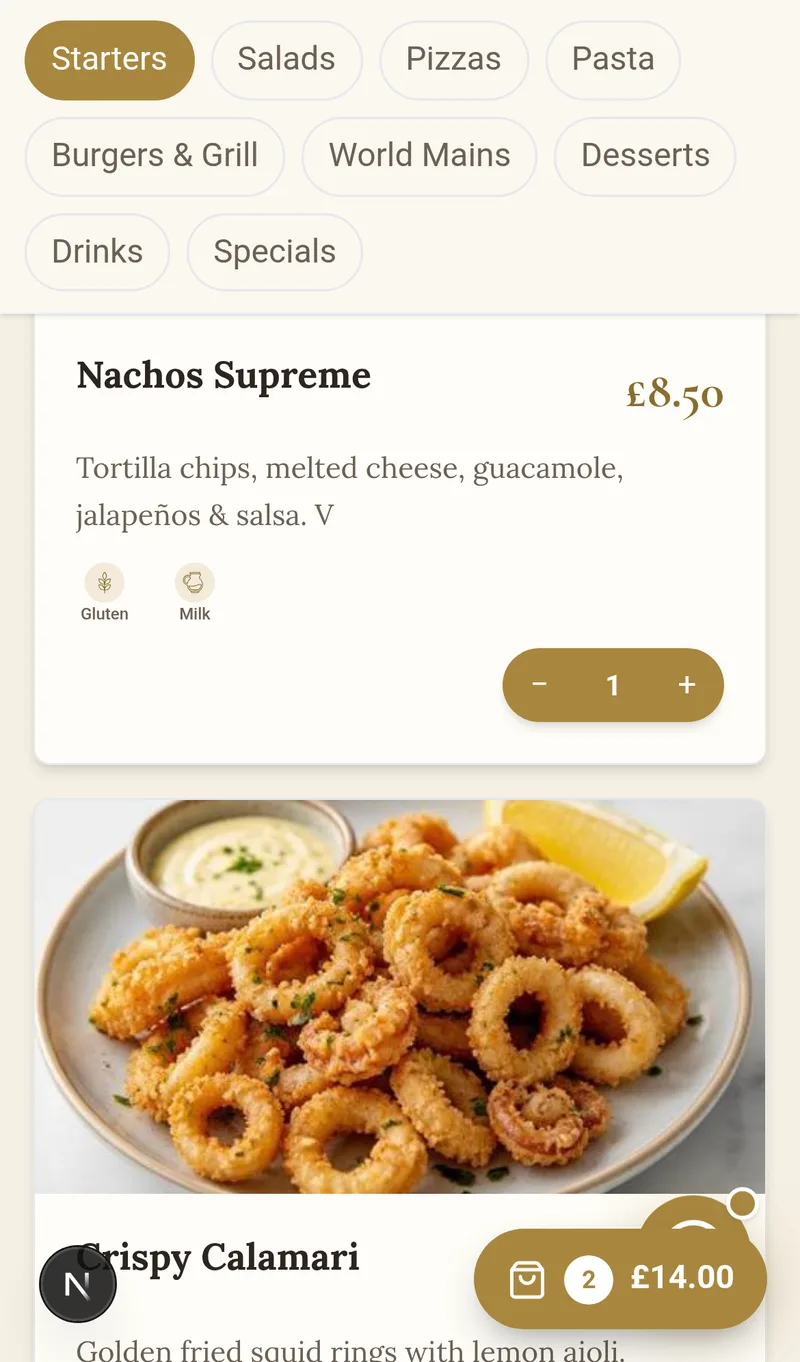
- The customer scans the QR of their table → your menu opens with the notice "Table 4"
- They press "+ Add" on the dishes they want (with photos, allergens, and description in their language)
- The floating cart button shows the total at all times
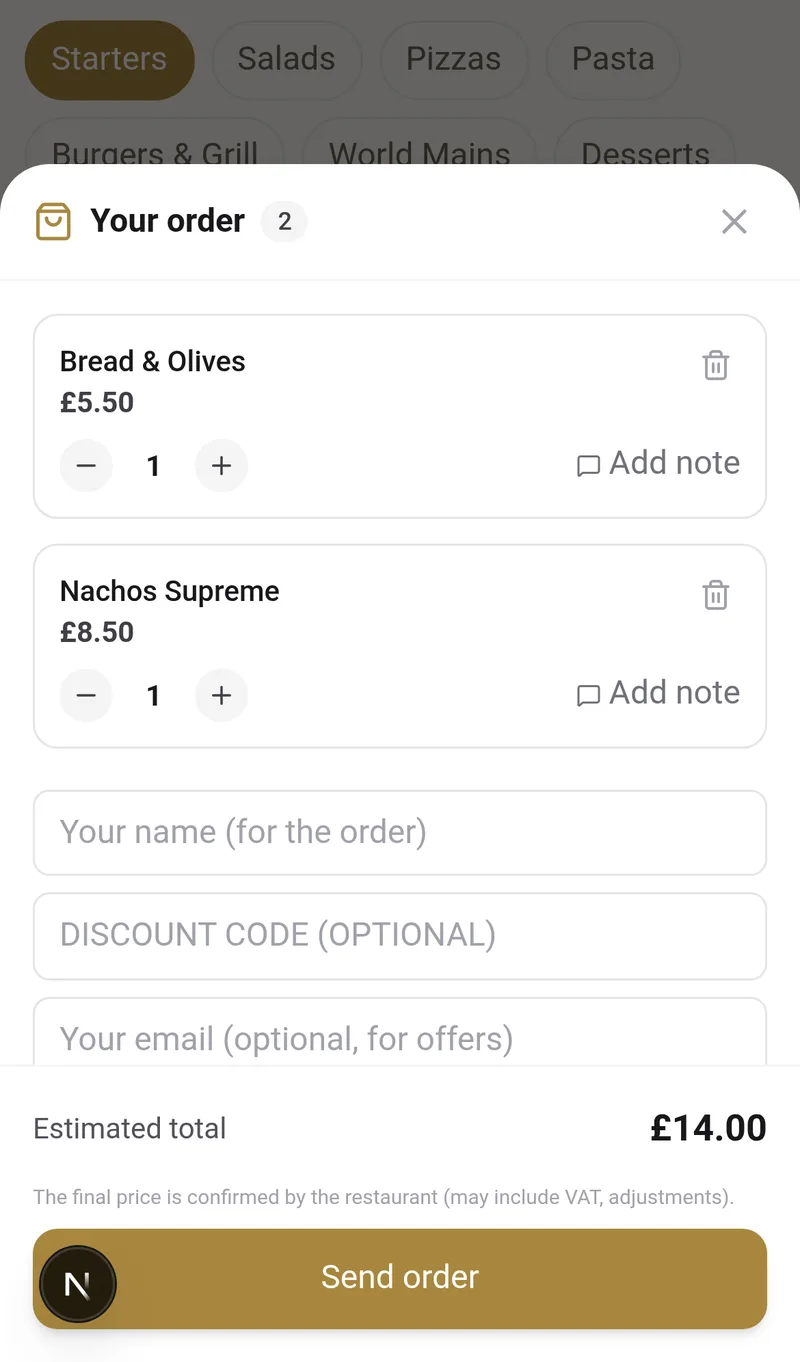
- In the cart, they can adjust quantities, add notes per dish, enter a discount code (from your promotions), and leave their email for offers (opt-in that feeds your CRM)
- They press "Send order" → they receive a link to track their order and request the bill, without registering
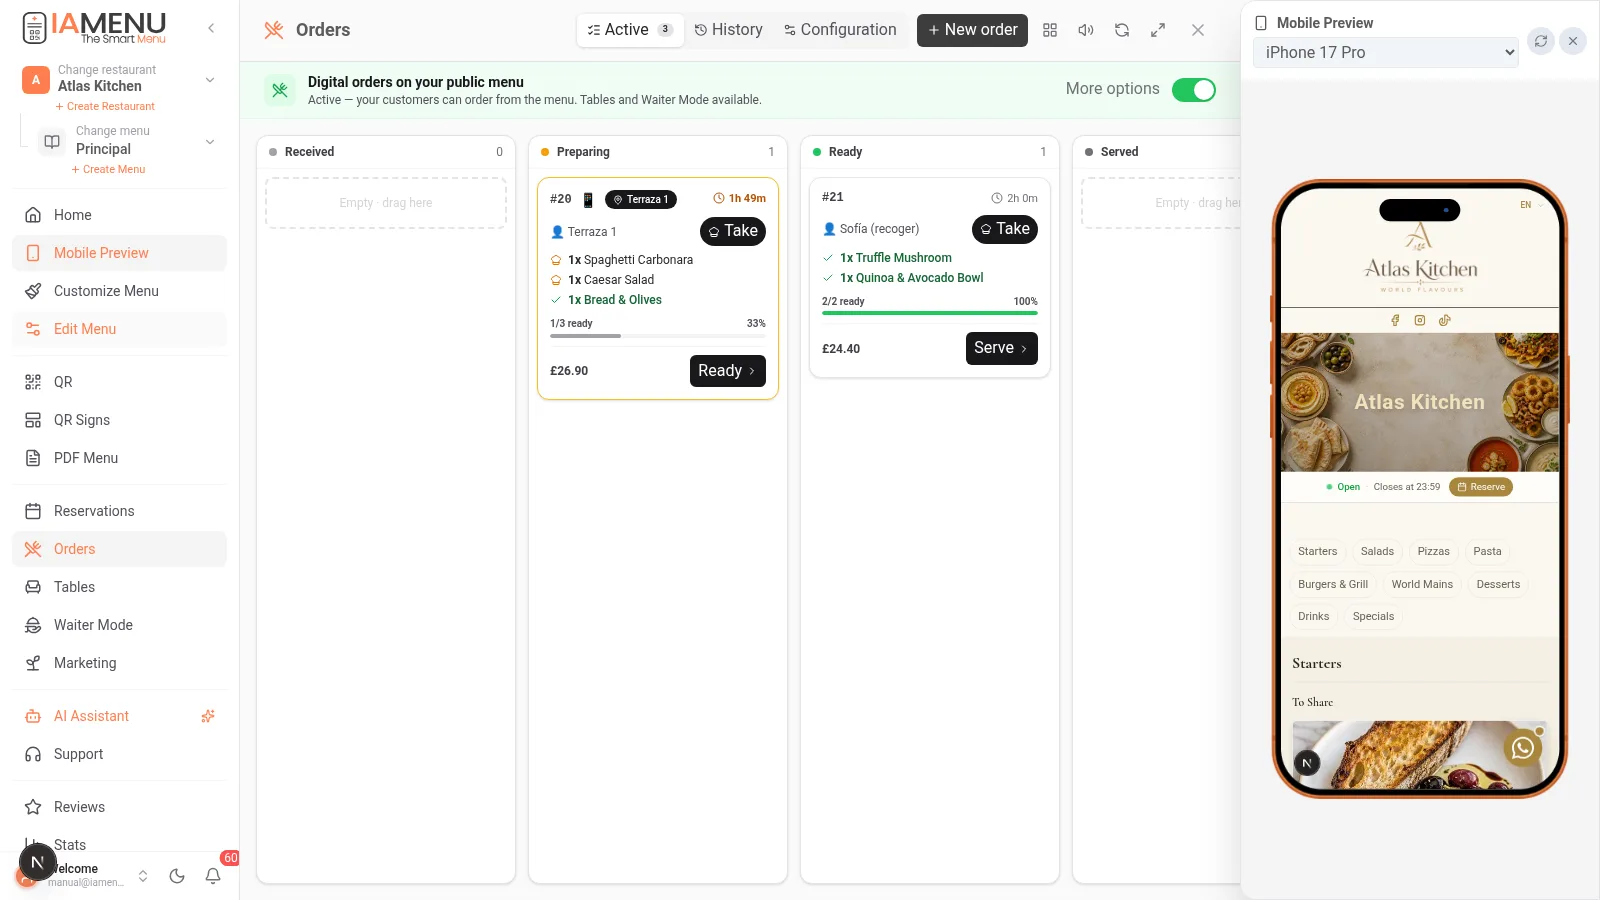
While the customer orders from their mobile, you see the order come in on the Orders panel in real-time, with a notification sound. Each card shows the table, the dishes, the notes, and the elapsed time.
Importante
The price that the customer sees when ordering is FROZEN in the order (snapshot). If you change a price later, already sent orders are not altered. The final bill is charged by your usual POS: IAMenu does not process payments from the diner.
Step 4: The kitchen kanban
The Orders panel is a Trello-style board with the complete cycle:
Received → Preparing → Ready → Served → Completed
- Drag the cards between columns or use the buttons (Take → Ready → Serve)
- Mark individual dishes as ready: the card shows the progress "2/3 ready"
- Multi-cook: each cook can "Take" orders and filter only their own
- Full-screen kitchen mode for the kitchen tablet (KDS)
- History + CSV export: all past orders, filterable by date, table, or cook
- Statistics: average ticket, cooking times, peak hours, and top products in Statistics
Step 5: Waiter Mode
For the dining staff, there is a dedicated view designed for the waiter’s mobile:
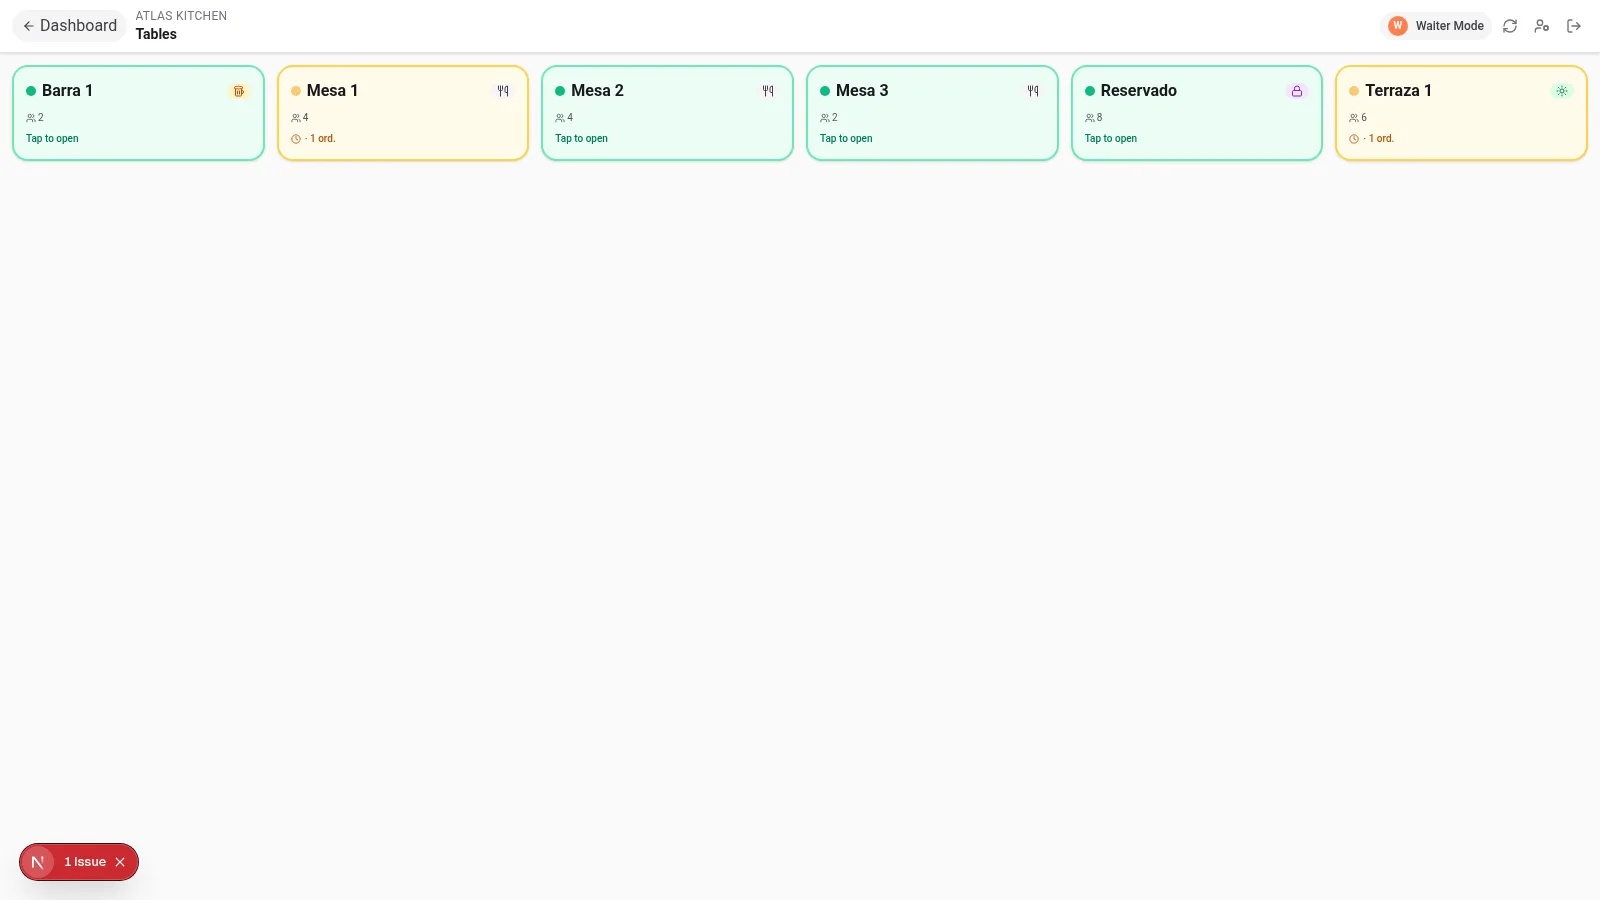
- In the side menu, press Waiter Mode (appears when orders are activated)
- The waiter sees the table grid with its status: free, open, with pending orders
- Tap a table → take the order using the same visual menu as the customer (photos, allergens, everything)
- The order enters the kanban like the others, with the name of the registered waiter
They can also register manual orders that come in by phone or WhatsApp with the "+ New order" button on the panel, indicating the source.
Step 6: Waiters with PIN (no email)
Your waiters do not need a corporate email. Like in professional POS:
- In My Team, create a "Waiter (PIN only)": name + 4-digit PIN
- The waiter logs in from their mobile by selecting their card and typing their PIN
- Their session lasts 12 hours and they only see what they need: Orders, Reservations, Tables, and Menu
- Changing the PIN invalidates previous sessions (employee leaving = one click)
Step 7: Takeaway, food trucks, and businesses without tables
Tables are optional. If the customer scans your general QR (without a table):
- The order asks for their name ("Order for Sofia") and goes to the kitchen the same way
- Perfect for takeaway, food trucks, and counters
- Orders without a table are marked with 🥡 in the kanban
Tip
Hours are also optional: without configured hours, orders are accepted at all times. If you set hours, outside of hours the customer sees "We open at 12:00" with your phone number to call.
What IAMenu DOES NOT do (on purpose)
- Does not charge the diner: the bill is charged by your POS. IAMenu takes the order.
- Does not issue tax invoices: that is already done by your POS.
- Does not deliver: for delivery, connect your menu to external channels.
Philosophy: a tool that helps, not complicates. IAMenu is the best complement to your POS, not its replacement.
Common troubleshooting
The customer does not see the order button
Check that "Digital orders" is activated in Orders → Settings, that your plan includes it (Professional/Premium or trial), and that you are within the ordering hours.
The order does not sound in the kitchen
The sound requires that the tab of the panel is open. Activate the speaker icon in the header of the Orders panel and increase the volume of the kitchen device.
An order arrived at the wrong table
Open the order → "Move table" → choose the correct table. You can move the loose order or all rounds of the session.
Related tutorials
- QR Code and posters to print the QR codes of your tables
- Reservations so that in addition to ordering, they can reserve
- Marketing to capture the diner's email when ordering and make them return
- Customer view to refine the menu that the diner sees
Ready for your tables to order on their own?
Create your account and review the current plans and terms.