How to Customize Your Digital QR Menu for Restaurant (Complete Guide)
10 minutes
Customizing your digital QR menu is key to enhancing the professional image of your restaurant. A well-configured digital menu increases customer trust, improves navigation, and reinforces your brand identity. Restaurants with personalized menus receive 40% more interaction than those using generic designs.
In this guide, you will learn step by step how to set up restaurant information, activate WhatsApp, adjust hours, and design the visual style of your online menu. The entire process takes less than 10 minutes.
What is the Customer View in a QR Menu?
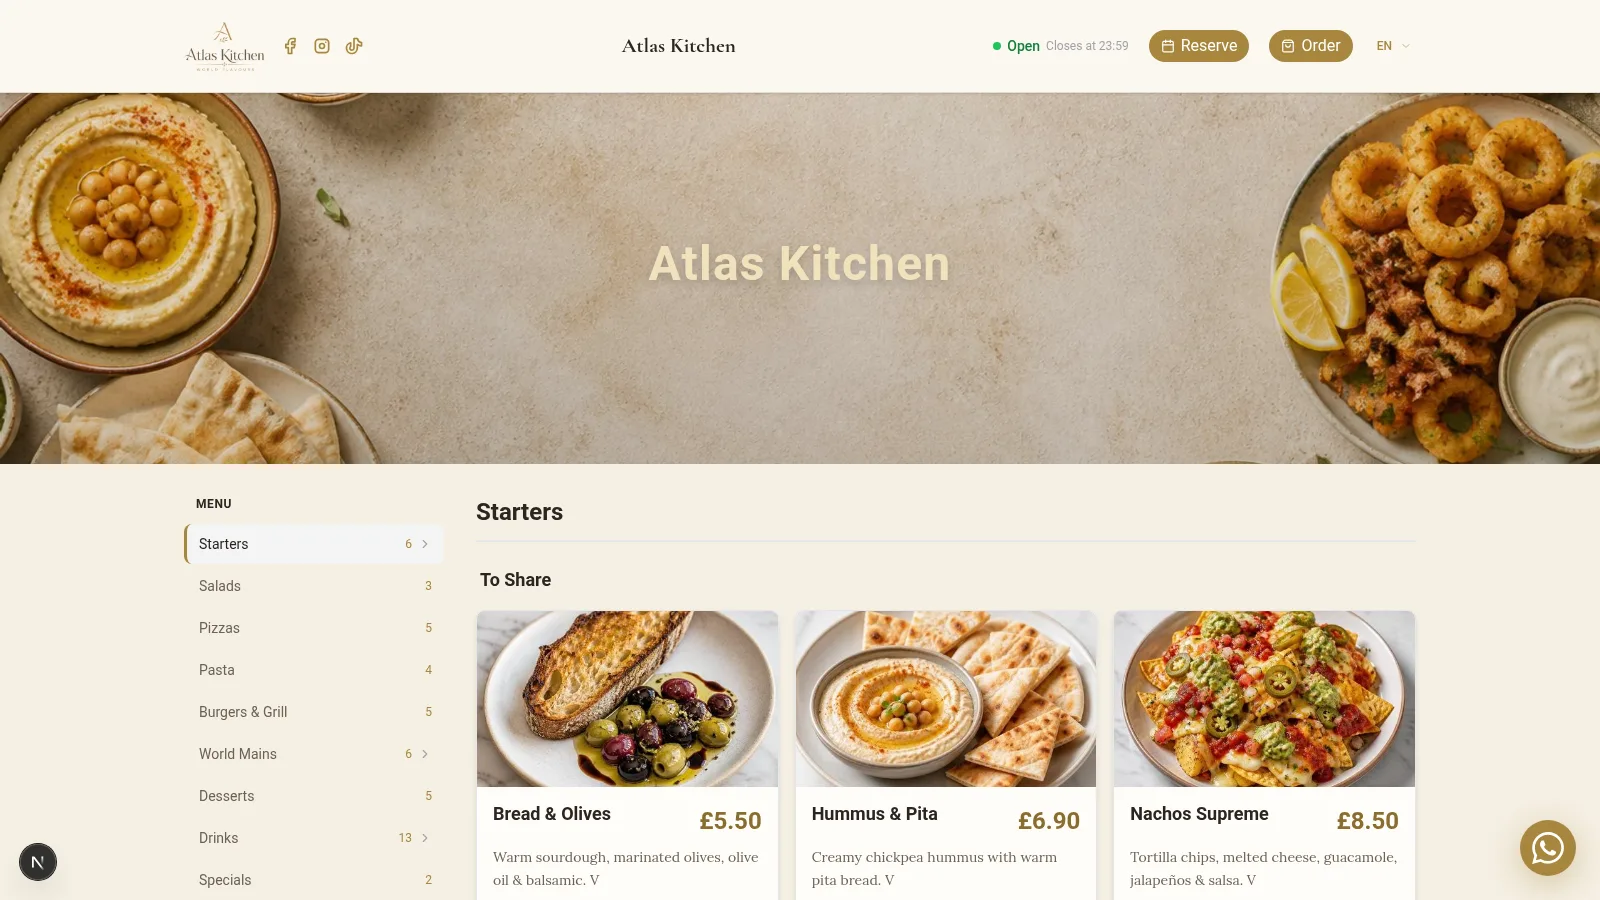
The Customer View is the public version of your digital menu. It is what the user will see when they scan the QR code from their mobile or access the menu link.
This view includes all visible elements:
- Restaurant logo with configurable position
- Custom main image for the header
- Categories and products organized by sections
- Prices and descriptions in the customer's language
- Allergen indicators with automatic icons
- Social media linked to your profiles
- WhatsApp button for direct contact
- Complete contact information in the footer
Customizing this view allows you to adapt the QR menu to your visual identity. The customer perceives a professional experience from the very first moment.
Why is it Important to Customize Your Digital Menu?
A generic QR menu reduces visual impact and differentiation from the competition. In contrast, a personalized digital menu offers clear advantages:
- Reinforces your brand with your own colors and logo
- Improves readability with adapted fonts and sizes
- Increases customer trust by seeing a professional design
- Facilitates direct contact via WhatsApp and social media
- Conveys professionalism from the first scan of the QR code
- Differentiates your business from restaurants with generic menus
Restaurants that personalize their QR menu report notable improvements in customer experience and time spent on the menu.
How to Access the Customer View Configuration
- Enter your control panel on the dashboard.
- Click on the Edit Customer View button in the top bar.
- The Configure Restaurant module will open with all options.
- Enter your control panel on the dashboard.
- Click on Edit Customer View in the menu.
- The Configure Restaurant module will open with all options.
From here, you can modify all aspects of the design and configuration. Changes are saved automatically when you press the save button.
Step 1 – Configure General Information
Add the basic details of your restaurant. This information appears in the footer of the digital menu and helps customers contact you.
Available fields:
- Email for restaurant contact
- Phone with international prefix
- Website or reservation link
- Complete address of the location
- City where the restaurant is located
- Postal code for precise location
- Country of the business
Tip
Complete all fields. Customers value being able to find phone, address, and email without leaving the menu. A complete footer conveys trust.
Step 2 – Activate WhatsApp on Your QR Menu
You can enable a direct contact button via WhatsApp. This button will be visible in the customer view so they can message you immediately.
Steps to configure it:
- Activate the WhatsApp option in the panel
- Enter your number with country code (example: +34 612345678)
- Set up an optional automatic message (example: "Hello, I want to make a reservation")
The button will appear floating in the customer view. On mobile, it opens the WhatsApp app directly. On desktop, it opens WhatsApp Web. The predefined message makes it easier for the customer not to have to write from scratch.
Step 3 – Configure Restaurant Hours
Define the opening hours for each day of the week. The system automatically shows whether the restaurant is open or closed in real time.
Options for each day:
- Activate or mark as closed depending on the day
- Opening hour of the restaurant
- Closing hour of the service
- Differentiated kitchen hours (optional)
Tip
If your kitchen closes before the restaurant, use the kitchen hours field. This way, customers know until what time they can order hot food.
Step 4 – Add Social Media
You can display your social media within the QR menu. The icons appear in the footer with direct links to your profiles.
Available networks:
- Instagram to showcase photos of dishes
- TikTok for restaurant videos
- YouTube for long content
- X (Twitter) for local news
- Other networks like Facebook or Google Maps
You just need to add the complete URL of each profile and activate its visibility.
Social media helps generate followers directly from the menu. A satisfied customer can follow you on Instagram with a single tap.
Step 5 – Customize the Branding of the Digital Menu
Here you define the visual design of your digital menu. It is the most important section for brand identity.
Menu Title
Customize the text that will appear over the main image. You can use the restaurant name or a welcome message.
Title Position
Choose where the text appears over the image:
- Top left
- Top center
- Center (more visual impact)
- Bottom left
- Bottom center
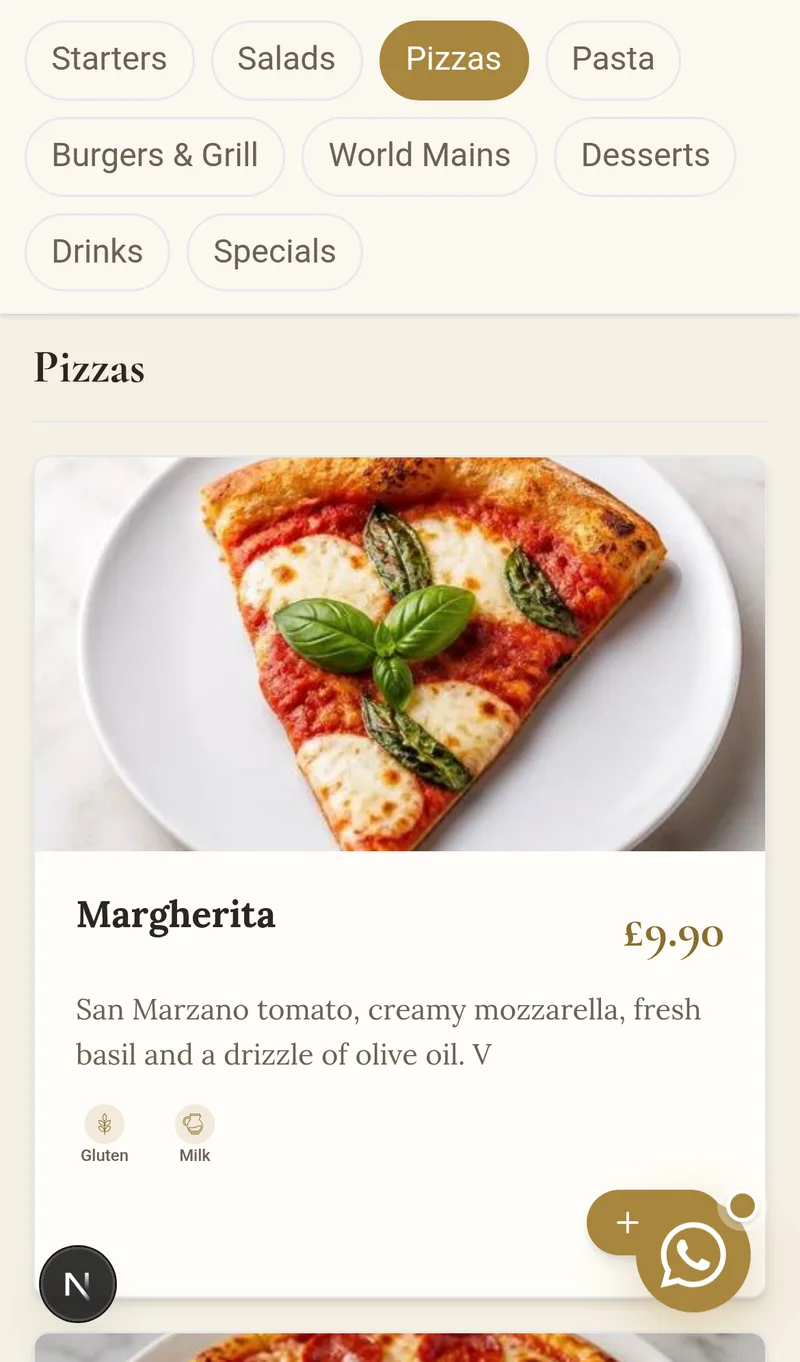
Menu Style
Select how the products are presented:
- Grid with cards and large image (ideal for dishes with photos)
- List with small side image (better for extensive menus)
- Minimal just text (perfect for wine lists or simple menus)
Logo
Upload your logo in PNG or JPG format. Recommended size: 256x256 pixels. The logo appears in the upper corner of the menu.
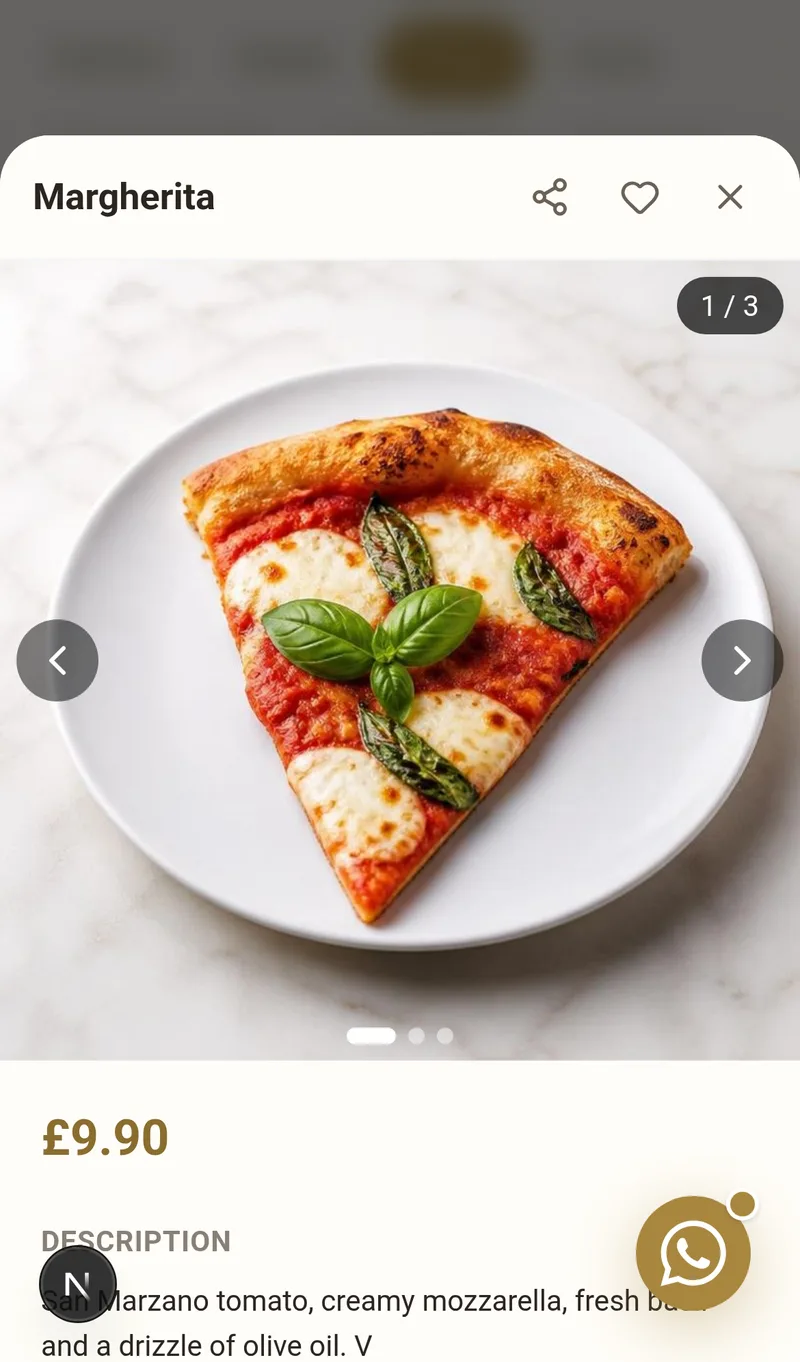
Main Image
Add a featured image for the header of the menu. Recommended size: 1200x400 pixels. Use a photo of your location or your star dish.
Step 6 – Change Colors and Styles of the QR Menu
You can modify each visual element of the menu to match your corporate identity:
Elements with customizable color:
- Header and footer
- Category titles
- Product descriptions
- Prices and currency
- Navigation icons
- Allergen colors
Additional adjustments:
- Text size (titles, descriptions, prices)
- Intensity of darkening of the main image
- Opacity of product cards
This allows you to fully adapt the design of the digital menu to your corporate identity. Each color can be adjusted with an intuitive visual selector.
Menu Styles: 12 Designs + AI Generator
In Customize Menu → Styles, you choose the complete visual identity of your menu with a click:
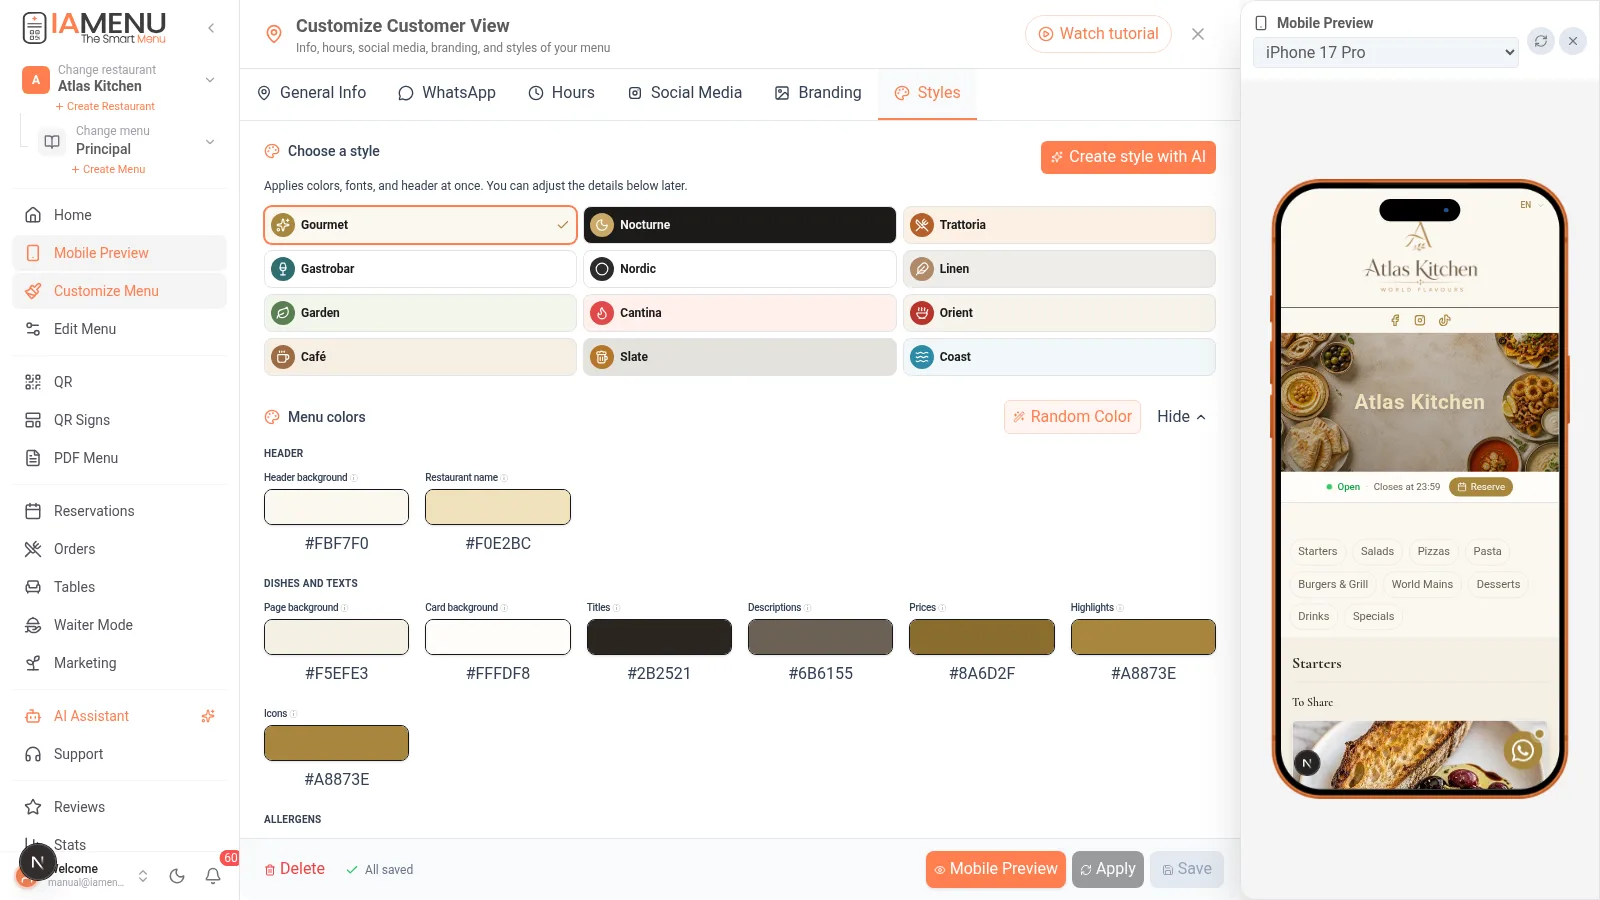
- 12 professional styles (Gourmet, Nocturnal, Trattoria, Gastrobar, Nordic, Linen, Orchard, Cantina, East, Café, Slate, Coast): each applies colors, typography, and header at once
- Fine-tuning: afterwards, you can adjust each individual color (background, cards, titles, prices, allergens...)
- ✨ Create style with AI: describe your venue ("Mediterranean terrace at sunset") and the AI generates a palette with guaranteed contrast
- The same style dresses your online menu, your PDF, and your QR posters — consistent identity throughout
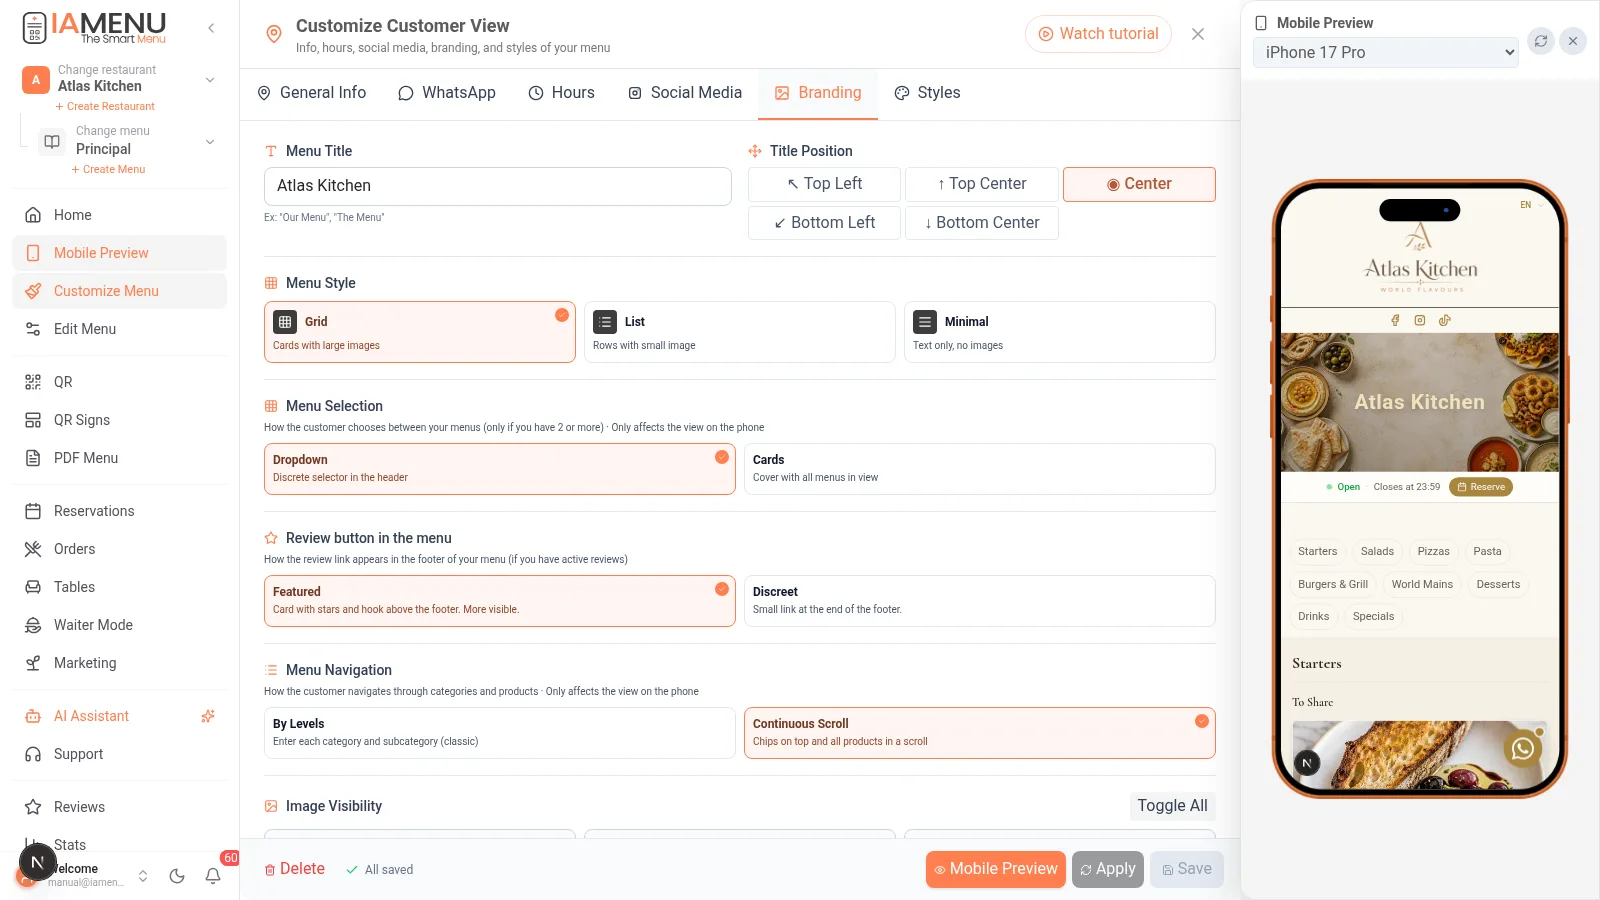
Two Ways to Navigate Your Menu (Choose in Branding)
- Menu selection: classic dropdown or cover in cards (if you have multiple menus, the diner sees an elegant cover and enters the one they want)
- Menu navigation: by levels (categories → products) or continuous scroll with fixed category chips at the top, app-style delivery
Change them whenever you want: they are two switches in Customize Menu → Branding.
Final Result – How the Customer Will See Your Digital Menu
Once the changes are saved, the customer will see a professional and personalized QR menu:
- Your logo in the upper corner
- Custom image as a visual header
- Organized categories with your color palette
- Products with price and description in their language
- Allergen indicators with clear icons
- Social media in the footer with direct links
- Floating WhatsApp button for immediate contact
- Opening status in real time (open/closed)
Use the preview to check the result before publishing. You can make adjustments at any time without affecting the menu products.
Tips and Best Practices
Follow these recommendations to achieve the best result with your personalized QR menu:
- Use quality photos for the header. A good image generates more trust than a generic design.
- Maintain visual consistency between the menu colors and your decor. If your restaurant has warm tones, use a matching palette.
- Always configure WhatsApp. Direct contact increases reservations and reduces friction.
- Test on mobile before publishing. 85% of QR scans are done from smartphones.
- Update the main image each season. Showcase your star dish for winter or summer.
- Complete all hours. A restaurant without visible hours loses trust.
- Choose the Grid style if your dishes have AI-generated photos. The visual impact is much higher.
Importante
Avoid using light text colors on light backgrounds. Always check that the contrast is sufficient to read prices and descriptions well.
Common Problem Solutions
Changes are not visible on the public menu
Make sure to press the Save button after each change. Changes do not apply until confirmed. If the issue persists, refresh the public menu page.
The logo appears blurry or pixelated
Upload an image with a minimum resolution of 256x256 pixels in PNG format. Images that are too small stretch and lose quality.
The WhatsApp button does not appear
Check that the option is activated and that the number includes the country code. Correct example: +34612345678. No spaces or dashes.
The main image looks dark
Adjust the darkening intensity in step 6. If the value is too high, the image appears almost black. Reduce the opacity until the text is legible but the photo looks clear.
The hours are not displayed correctly
Check that each day has opening and closing hours. If a day is marked as closed, no hours will appear for that day.
Frequently Asked Questions about Menu QR Customization
Can I change the design without affecting the products?
Yes. The design is completely independent of product management. You can change colors, logo, and image without modifying the categories or dishes.
Are changes updated automatically?
Yes. Once you press save, changes are reflected in real time. Customers will see the new version upon refreshing the QR menu.
Can I use different styles for different menus?
Yes. If you have multiple active menus (lunch, dinner, events), each can have its own customized visual design.
What image format works best for the logo?
PNG with a transparent background is the best option. The ideal size is 256x256 pixels. JPG also works but does not support transparency.
Can I revert to the previous design if I don’t like the change?
Yes. You can load one of the 4 predefined themes (Classic, Modern, Warm, Elegant) at any time to restore a base design.
Related Tutorials
Complete your setup with these guides:
- Advanced color and theme customization for more detailed design adjustments
- Generate professional QR code to create the QR that links to your personalized menu
- Export menu as PDF to print your menu with the same design
- Menu management to organize categories and products before customizing
- Create products with AI images to fill your menu with professional photos
Conclusion
Customizing your QR menu not only improves aesthetics. It optimizes the customer experience and strengthens the digital image of your restaurant. Spending 10 minutes configuring the Customer View can make a significant difference in perception and conversion. Restaurants with personalized QR menus convey professionalism from the first scan.
More information: